Those of you who know me, know that I am lovin' my new Distress Inks! They are made by Ranger and the designer behind the idea is my Guru, Tim Holtz. I have been introducing this line of Distress Inks and Distress products to my card making students and would like to share some of my 'budget-wise' ideas when purchasing and using them.
When I made the decision to invest in this line of ink, I did some research on where I could buy them at the lowest cost. As we do not have a craft supply store that stocks these items I ended up ordering them online. I price compared online suppliers and ended up buying them through two different suppliers, http://www.trinitycrafts.ca/ and http://www.simonsaysstamp.com/. Both suppliers have every day low prices and shipping costs, Trinity Crafts is a Canadian Company and Simon Says Stamp is American. I recommend both. The inks are priced at $4.99 and $4.95 respectively which is low compared to Michaels $8.95 per package.
The next investment was to purchase the necessary tools to use these inks. Ranger/Tim Holtz makes a 'vintage-looking' applicater tool which sells for $8.95 EACH at Michaels. Not in my budget! So I got creative and went to my local Disabled Adults Woodworking Shop and had them cut 24 wooden blocks to which I attached self adhesive, 1" wide, velco, and have been more than happy with the results! I found the velco on the 'real' tool came off too easily and was told by the company to "staple gun the velco to the tool', which I paid $8.95 plus tax for. Tsk Tsk!! Total cost of my version $12.00!
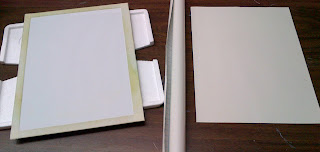
The next tool required is the "craft mat", which is a sheet of teflon, and retails for $17.95. Again, out of my budget. So, I went to my local Dollar Store and bought white MacTack for $1.00, and adhered it to a piece of white cardstock and made my own craft/splat mats, which work beautifully! I purchsed 8 1/2" x 11" glass picture frames of the type that has metal clips holding the glass to the backing. This is important as this type of glass already has the edges ground smooth, which prevents nasty cuts! To be extra sure of not cutting anyone, I applied masking tape to the edges and store them in the original Styrofoam packaging to protect them and prevent chipping. I then purchased, online at Trinity Crafts, the necessary foam blending pads at their everyday discounted price of $4.99 for a package of 10. I did attempt to make my own foam pads, but without success so far, I'll keep trying!
To use: Apply Distress Ink to glass plate directly from ink pad in a pouncing motion. Apply foam blending pad to blending tool and pick up ink from glass plate, loading the foam pad. Apply ink in a circular blending motion to cardstock, using your homemade craft/splat mat as your work surface. Clean up is a snap with a baby wipe. You guesed it, I also make my own babywipes!!


No comments:
Post a Comment